Swab the stopper with 70% isopropyl alcohol and let it dry. Draw air equal to the volume you want. Insert the needle bevel up at a 45 to 60 degree angle, straightening to 90 degrees as it passes through the rubber. Inject the air into the headspace, invert the vial, withdraw, and use a fresh puncture site next time.
A multiple-dose vial is designed to be entered many times, and the thing making that possible is a rubber stopper that reseals after each puncture. Treat it carelessly and you get coring: the needle cuts a plug out of the rubber, which drops into your solution and leaves a stopper that no longer seals. Here is the full sequence that avoids it.
What you need
- The vial, at room temperature
- 70% isopropyl alcohol swabs
- A new sterile needle and syringe for every withdrawal
- A clean, uncluttered work surface
- A pen, for dating the vial on first entry
Step by step
- Clean your hands and the surface. Most contamination comes from the environment and fingers, not from the vial.
- Remove the flip cap (first use only). The stopper underneath is clean but should not be assumed sterile.
- Swab the stopper firmly for several seconds, then let it air-dry completely. This is the step people skip. Alcohol does much of its disinfecting as it evaporates, and a wet stopper can carry alcohol into the vial on the needle.
- Date the vial if this is the first puncture. The in-use clock starts now and runs 28 days.
- Draw air equal to the volume you plan to remove. Pull the plunger back to that mark.
- Insert the needle correctly. Bevel up, tip on the stopper at 45 to 60 degrees, gentle downward pressure, straightening to 90 degrees as it passes through. This makes the bevel slice rather than punch.
- Inject the air into the headspace above the liquid, not into the liquid, so you do not create bubbles.
- Invert the vial, keep the needle tip below the liquid surface, and draw slightly past your target volume.
- Clear bubbles. With the vial still inverted, tap the barrel so bubbles rise, push them back in, then set the exact volume.
- Withdraw straight out and return the vial to room-temperature storage, out of direct light.
Why the angle works
A needle tip is a sharpened ellipse. Pushed straight down, the leading edge can punch a circular plug clean out of the rubber, the same way a hole punch works. Entering at an angle and straightening as it advances means the bevel cuts a slit and pushes rubber aside instead of cutting a disc free.
Needle gauge matters for the same reason: the larger the needle, the bigger the potential plug and the wider the hole left behind.
| Needle | Coring risk | Resealing |
|---|---|---|
| Large bore (low gauge number) | Higher | Leaves a wider hole |
| Fine bore (high gauge number) | Lower | Seals more reliably |
| Reused or dull needle | Highest | Tears rather than slices |
If you consistently see rubber fragments, the usual culprits are a needle that is too large, a straight-down insertion, or a needle that has been used before.
Rotate your puncture sites
Most stoppers have a marked target ring. Use a different spot inside that ring on each entry rather than going back through the same hole. Repeated punctures in one place thin the rubber until it stops sealing, which is what turns a 28-day vial into a 10-day vial.
Why balance the air?
Every millilitre of liquid you remove leaves a millilitre of empty space behind. Without replacing it, pressure inside the vial drops:
- The plunger fights you, and precise measurement gets harder.
- Unfiltered room air gets drawn in around the needle when you withdraw.
- Bubbles form in the syringe, so the volume you think you have is wrong.
Injecting an equal volume of air first keeps the pressure neutral and makes the draw smooth.
Common mistakes
| Mistake | What goes wrong |
|---|---|
| Not letting the alcohol dry | Weaker disinfection, and alcohol carried into the vial |
| Straight-down insertion with a large needle | Coring, rubber fragments in solution |
| Same puncture spot every time | Stopper thins and stops resealing |
| Reusing a needle | Dull tip cores more, and sterility is gone |
| No air balance | Vacuum, bubbles, inaccurate volumes |
| Injecting air into the liquid | Foaming and bubbles that are hard to clear |
| Not dating the vial | No way to know when day 28 arrives |
Troubleshooting
There is a rubber fragment floating in the vial
Discard the vial. The fragment means the stopper has been cut, so the seal is unreliable from here on, and filtering the solution does not restore it.
The plunger is hard to pull
You are fighting a vacuum. Inject more air into the headspace, in small increments, until the draw feels neutral.
The stopper leaks after withdrawal
The rubber is worn, usually from repeated punctures in one spot. Finish the vial early rather than risking contamination.
Bubbles keep appearing in the syringe
Keep the needle tip below the liquid line while the vial is inverted, and inject air into the headspace rather than under the surface.
When to stop using the vial
Discard at 28 days after the first puncture, and earlier if the liquid turns cloudy, shows particles or color, if the vial is cracked, or if the stopper no longer reseals. The reasoning and the storage rules are in how long bacteriostatic water lasts.
Mixing a solution next? The reconstitution math guide and the calculator cover the volumes.
This guide describes general aseptic laboratory technique. It is not medical advice.
Frequently asked questions
What is vial coring?
Coring is when a needle cuts a small plug of rubber out of the vial stopper as it passes through. The fragment can fall into the solution and the damaged stopper may stop resealing properly.
How do you avoid coring a stopper?
Use a finer needle, insert it bevel up at roughly 45 to 60 degrees, apply gentle pressure and bring the needle upright as it passes through the rubber, and puncture a different spot each time.
Why inject air into the vial before withdrawing?
Removing liquid without replacing the volume creates a partial vacuum, which makes the plunger fight you and draws unfiltered air in around the needle. Injecting an equal volume of air first keeps pressure balanced.
How many times can you puncture a multi-dose vial?
There is no fixed number. Each puncture wears the stopper, so rotating sites and using fine needles helps the vial reseal reliably through its 28-day in-use period.
Do you need a new needle every time?
Yes. A reused needle is duller, which makes coring more likely, and it is no longer sterile.
What if I see rubber fragments in the vial?
Discard the vial. Filtering is not a fix for a compromised stopper, and the fragments indicate the seal has been damaged.
Sources
- USP General Chapter <797> Pharmaceutical Compounding: Sterile Preparations usp.org
- Bacteriostatic Water for Injection, USP prescribing label, DailyMed, U.S. National Library of Medicine dailymed.nlm.nih.gov
- ASHP: Crosswalk of Guidance and Standards for Managing Beyond-Use Dates ashp.org
We write from primary sources such as FDA drug labels and USP standards. See our editorial policy. Spot an error? Email [email protected].
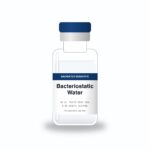
From BacWater Scientific
10 mL bacteriostatic water, stocked in the US
0.9% benzyl alcohol, multi-dose vials. The per-vial price drops automatically at 3, 5 and 10 vials.